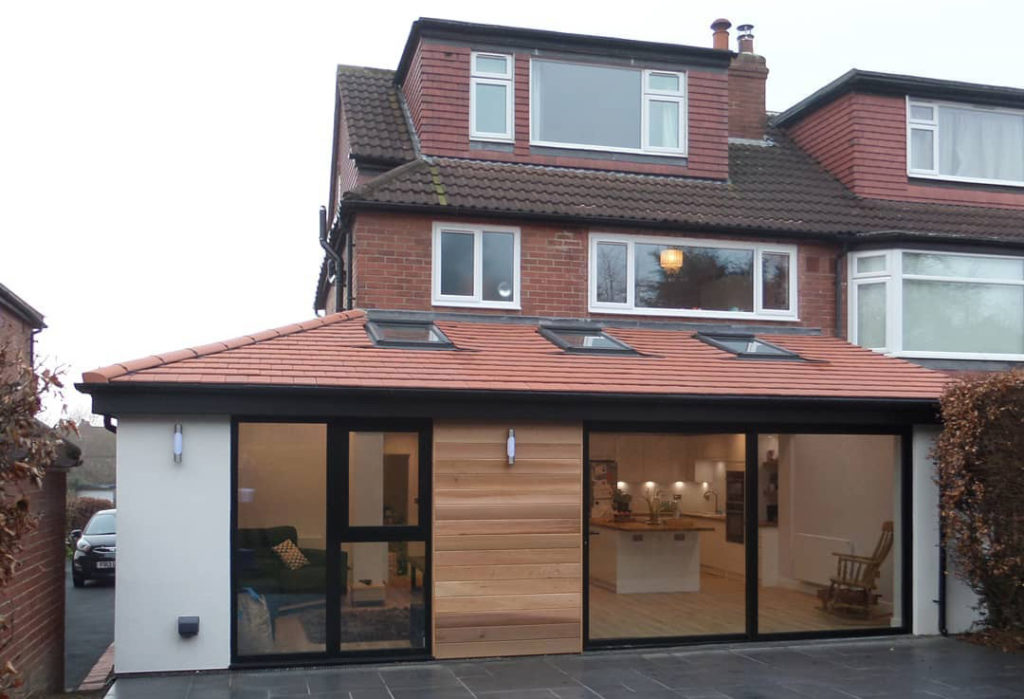
Tag: architect

Architecture & Building

The Controversy Surrounding Demolishing Vacant Buildings for Unauthorized Housing Development in 2023

In urban areas around the world, the issue of vacant and derelict buildings is a persistent challenge. These structures not only contribute to urban blight but also create safety hazards and deter economic development. As cities grapple with solutions to repurpose these vacant properties, an alarming trend has emerged in 2023. The unauthorized demolition of vacant buildings to construct flats or houses without proper planning permission. This controversial practice has ignited debates about urban development, property rights, and the rule of law.

The Trend of Unauthorized Demolition

As housing demands increase and urban spaces become scarcer, the temptation to circumvent legal channels and demolish vacant structures to make way for new developments has grown. Property owners and developers might see this as a quick way to address the housing crisis. Particularly in areas where obtaining planning permission is notoriously difficult or time-consuming.

However, unauthorized demolition poses numerous challenges to the community, the environment, and the established legal framework for urban development.

  1. Legal and Regulatory Concerns: Planning permission is a crucial aspect of urban development, as it ensures that new projects adhere to zoning regulations, building codes, and environmental standards. Unauthorized demolition undermines this process and disregards the need for community input and oversight.
  2. Safety and Infrastructure: Demolishing a building without proper permits can lead to unsafe construction practices. The absence of regulatory oversight might result in inadequate safety measures, substandard materials, and poor infrastructure. Which could pose risks to residents, neighbors, and the surrounding environment.
  3. Urban Aesthetics and Historic Preservation: Unauthorized demolition can also negatively impact the aesthetic and historical character of neighborhoods. Vacant buildings might hold architectural or cultural value, and their destruction without due consideration can erode the unique identity of an area.
  4. Community Engagement: When developers sidestep planning permission, they bypass opportunities for community engagement and input. This can lead to increased mistrust between developers and the community, hindering the collaborative approach needed for sustainable urban development.
  5. Environmental Impact: Unauthorized demolition can contribute to environmental degradation by generating additional waste and construction debris that may not be properly managed or recycled. This undermines efforts to promote sustainability and minimize ecological footprint.

Addressing the Issue

Cities need to address the root causes driving property owners and developers to demolish vacant buildings without proper permission. Here are some potential strategies:

  1. Streamlined Planning Processes: Municipalities should work on simplifying and expediting the planning permission process. This can reduce the incentive for developers to opt for unauthorized demolition due to delays and bureaucratic hurdles.
  2. Incentivizing Repurposing: Offering incentives to property owners to repurpose vacant structures can encourage the preservation of historical and architectural value while meeting housing demands.
  3. Public Awareness Campaigns: Educating the public about the importance of planning permission, community involvement, and sustainable development can create a stronger understanding of the consequences of unauthorized demolition.
  4. Stricter Penalties: Enforcing stricter penalties for unauthorized demolition can deter developers from taking shortcuts and violating the law.
  5. Collaborative Development: Local governments, developers, and communities should work together to develop solutions that address housing needs while respecting legal and environmental standards.

Conclusion

The practice of demolishing vacant buildings without planning permission in 2023 is a complex issue that highlights the tensions between urban development, property rights, and regulatory frameworks. While addressing the housing crisis is essential, it must be done in a way that respects legal processes, community involvement, and environmental sustainability. Striking a balance between these factors is vital for creating vibrant, safe, and thriving urban spaces that meet the needs of both present and future generations.

PHOTO: BIG STOCK/GETTY IMAGES

Contact us

Advice Center

A Step-by-Step Guide to Working with an Architect

When embarking on a construction or renovation project, whether it’s a new home, an office space, or a commercial building, the expertise of an architect can make a world of difference. Architects are skilled professionals who specialize in designing and planning structures that are not only functional but also aesthetically pleasing. Working with an architect can ensure that your vision is brought to life in the most efficient and effective way possible. To help you navigate this process, here’s a step-by-step guide to working with an architect:

Define Your Project Goals

Start by defining your project goals and objectives. What are you looking to achieve with this project? Do you have a clear idea of the purpose, functionality, and aesthetic you want for the space? Consider factors such as the size, layout, style, and any specific requirements you might have.

Research and Select an Architect

Research architects in your area and explore their portfolios. Look for architects whose work aligns with your vision and style preferences. You can also ask for recommendations from friends, family, or professionals in the construction industry. Once you’ve narrowed down your options, reach out to a few architects to discuss your project and get a sense of their approach and compatibility with your goals.

Initial Consultation with the Architect

Schedule an initial consultation with the architect(s) you’re interested in. During this meeting, share your project goals, ideas, and any specific requirements you have. Be open to their suggestions and insights, as their expertise can provide valuable guidance. This is also an opportunity to gauge their communication style and determine if you have a good rapport.

Establish a Budget

Work with the architect to establish a realistic budget for your project. They can provide insights into the cost implications of different design choices and materials. It’s important to be transparent about your budget constraints to ensure that the architect can develop a design that aligns with your financial limitations.

Conceptual Design

Based on your discussions and the information gathered, the architect will start developing a conceptual design for your project. This design will outline the overall layout, spatial organization, and general aesthetic of the space. Be prepared to provide feedback and collaborate with the architect to refine the design until it aligns perfectly with your vision.

Schematic Design

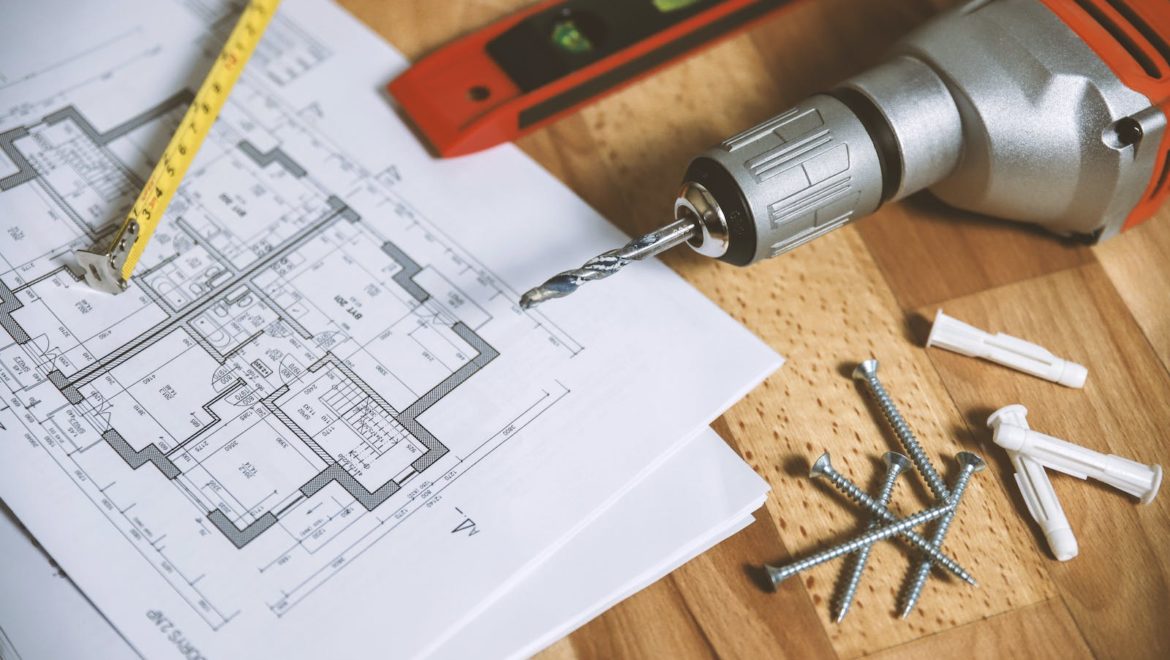
Once the conceptual design is approved, the architect will proceed with creating more detailed schematic drawings. These drawings will include floor plans, elevations, and potentially 3D visualizations to give you a clearer understanding of the space. This phase is crucial for making decisions about materials, finishes, and specific design elements.

Design Development

During this phase, the architect will further develop the design based on your feedback. The drawings will become more detailed, and specific materials, fixtures, and architectural elements will be chosen. It’s important to keep communication open and collaborate closely to ensure that the evolving design remains in line with your expectations.

Construction Documents

Once the design is finalized, the architect will create a set of comprehensive construction documents. These documents include detailed drawings, specifications, and instructions for contractors to follow during the construction phase. These documents are essential for obtaining permits and ensuring that the project is executed accurately.

Contractor Selection

With the construction documents in hand, you’ll need to select a contractor to bring the design to life. Your architect can provide recommendations or assist in the selection process. It’s important to choose a contractor with a proven track record and good communication skills to ensure a smooth construction process.

Construction Administration

Even as construction begins, the architect’s role is not complete. They will provide construction administration services, which involve regular site visits to ensure that the project is being executed according to the design intent. The architect will address any issues that arise during construction and make necessary adjustments.

Project Completion

As construction comes to an end, the architect will perform a final inspection to ensure that the project meets the design specifications and your expectations. Once everything is in order, you can officially celebrate the completion of your project and enjoy the space that was brought to life through collaboration and creative vision.

In conclusion, working with an architect is a collaborative process that requires clear communication, trust, and a shared vision. By following these steps and maintaining open lines of communication throughout the project, you can ensure that your architectural endeavor results in a space that not only meets your functional needs but also reflects your unique style and aspirations.

Image: iStock

Contact us

House Extension

Is it Cheaper to Move or Extend Houses in the UK?

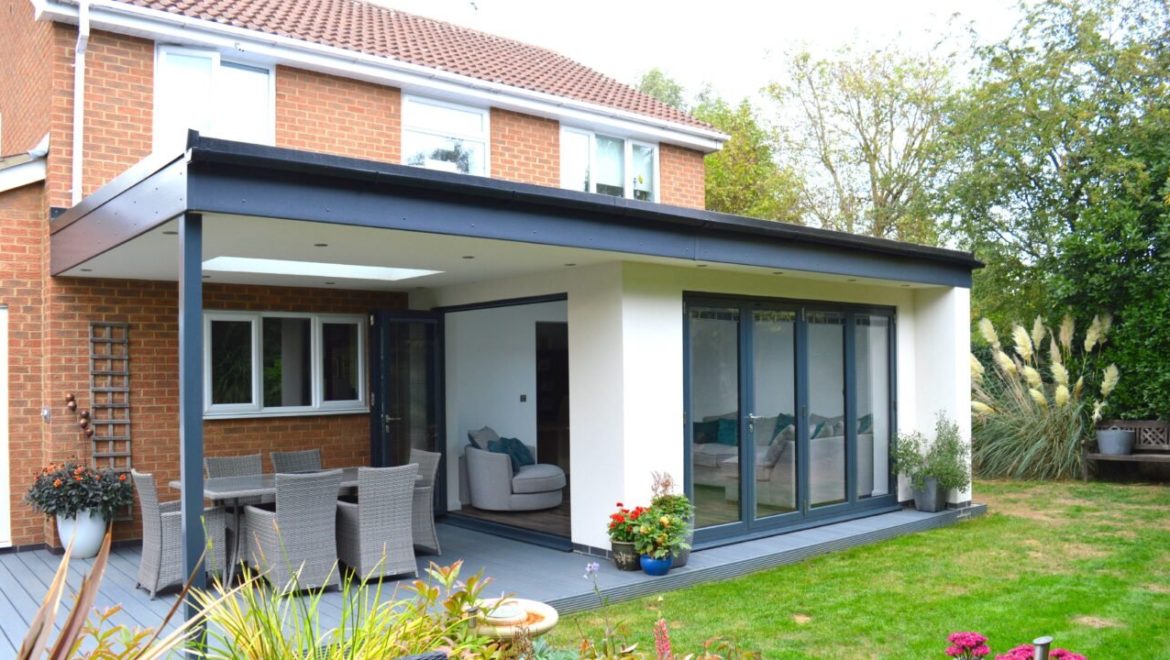
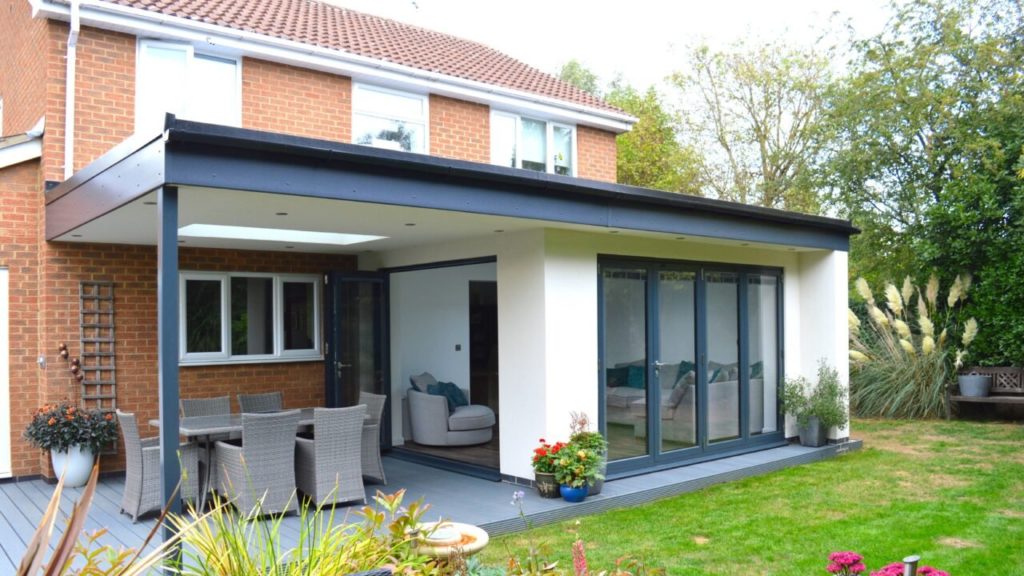
The decision to either move or extend a house in the UK is a significant one, often influenced by financial considerations, lifestyle preferences, and the practicality of each option. Both choices come with their own set of advantages and disadvantages. Making it crucial for homeowners to weigh them carefully before making a decision. Among the key factors that come into play, cost undoubtedly ranks high on the list. So, is it cheaper to move or extend houses in the UK? Let’s delve into the intricacies to help you make an informed choice.

Cost of Moving:

Moving to a new home is an exciting prospect, but it can also be financially demanding. The cost of moving is not limited to the purchase price of the new property; it involves various expenses that should be taken into account:

  1. Estate Agent Fees: When selling your current property, you’ll need to pay estate agent fees, which are typically a percentage of the property’s sale price.
  2. Stamp Duty Land Tax: If the property you’re purchasing exceeds a certain threshold, you’ll be required to pay Stamp Duty. This tax can significantly increase the cost of moving, especially for higher-priced properties.
  3. Legal Fees: Conveyancing fees cover the legal work involved in buying and selling properties. These fees can vary, but they’re an essential part of the moving process.
  4. Removal Costs: The expense of hiring a removal company to transport your belongings to the new property should also be considered.
  5. Miscellaneous Costs: Additional costs might include mortgage arrangement fees, surveyor fees, and other administrative expenses.

Cost of Extending:

Extending your current property is an alternative that can provide more space and potentially increase its value. However, like moving, extending a house also comes with financial implications:

  1. Construction Costs: The primary expense of extending is the construction itself, including materials, labor, and any necessary permits or planning application fees.
  2. Architect and Design Fees: To create a feasible and aesthetically pleasing extension, you’ll likely need to hire an architect. Their fees contribute to the overall cost.
  3. Planning Permission: Depending on the nature of the extension, you might need to obtain planning permission, which can involve additional costs and delays.
  4. Structural Engineer Fees: For more complex extensions, the expertise of a structural engineer might be necessary, adding another expense.
  5. Disruption Costs: During the construction phase, you might need to temporarily move out or adjust your living arrangements, which can lead to additional expenses.

Comparing the Costs:

The cost comparison between moving and extending houses varies greatly based on individual circumstances, location, and the scope of the project. In some cases, moving might seem more financially viable, especially if you’re upgrading to a larger or more desirable property. On the other hand, if you’re attached to your current location, have sentimental value invested in your home, or anticipate substantial property market costs, extending could make more sense.

Other Considerations:

When deciding whether to move or extend, it’s important to factor in non-monetary considerations as well:

  1. Emotional Attachment: Your emotional connection to your current home and neighborhood can heavily influence your decision.
  2. Market Conditions: The state of the property market can affect the ease of selling your current property or finding a suitable new one.
  3. Lifestyle: Consider how each option aligns with your lifestyle and long-term goals.
  4. Timing: Extending a property can take time, whereas moving might provide a quicker solution to your space needs.

In Conclusion:

Ultimately, the decision to move or extend a house in the UK depends on a variety of factors. With cost being just one aspect of the equation. It’s advisable to consult with financial advisors, architects, and real estate professionals to fully understand the financial and logistical implications of each choice. By carefully evaluating your circumstances and priorities, you can make the best decision that suits your needs and financial situation.

Image: https://admiralhomespace.com/extensions/

Contact us

Extensions

The Allure and Advantages of Glass Extensions

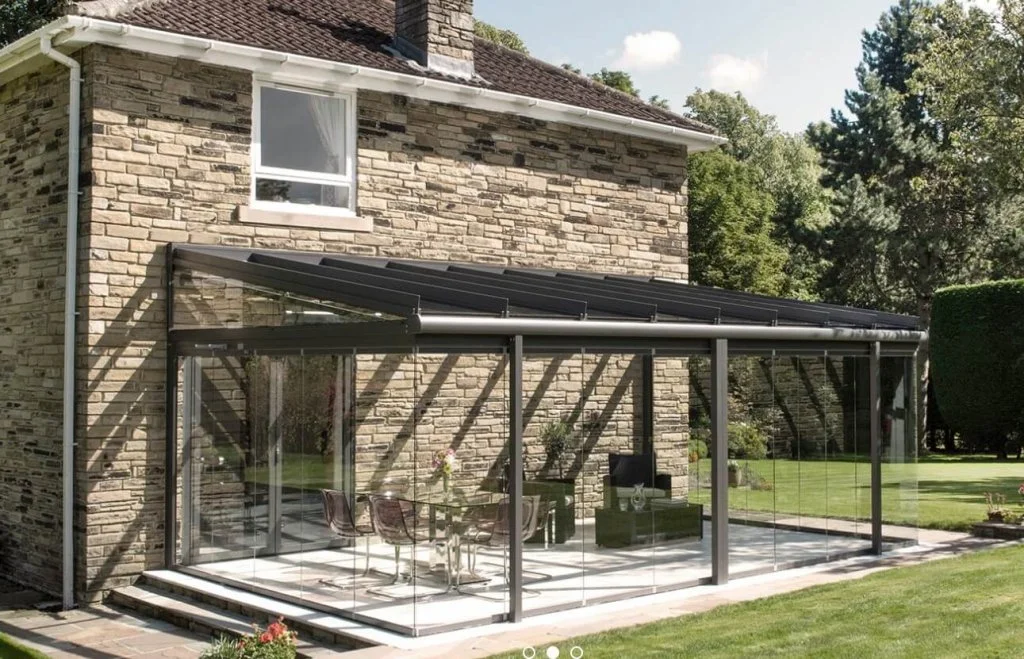
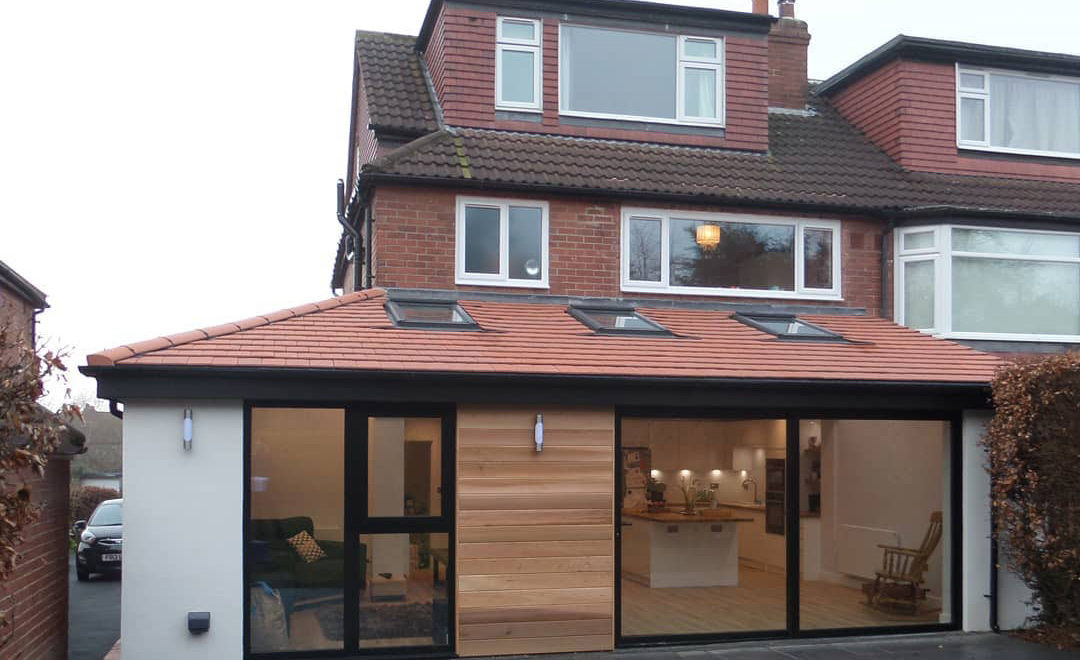
In the realm of modern architecture and interior design, glass extensions have emerged as a captivating and innovative way to seamlessly blend indoor and outdoor spaces. These structures, characterized by their extensive use of glass walls and roofs, are more than just architectural elements; they represent a fusion of aesthetics, functionality, and a deep connection with the natural environment. Glass extensions have gained immense popularity in recent years, transforming homes and commercial spaces into luminous havens of contemporary design.

The Aesthetic Elegance

Glass extensions evoke a sense of timeless elegance and sophistication, often becoming the focal point of a building’s design. The transparency of glass allows for an unobstructed view of the surrounding landscape. Creating a visual continuity between the interior and exterior. Whether it’s a sprawling countryside, a lush garden, or a panoramic urban vista, the incorporation of glass dissolves the traditional boundaries. Resulting in an immersive experience of space and light.

Architects and designers are embracing the challenge of seamlessly integrating glass extensions into various architectural styles. From ultra-modern homes to historic structures, glass extensions offer a unique juxtaposition of old and new, where the sleekness of glass complements the character of the original building. This synthesis of styles creates a dynamic conversation between the past and the present, contributing to a rich architectural narrative.

Nurturing Natural Light

One of the most captivating aspects of glass extensions is their ability to amplify the presence of natural light. Sunlight pouring through the glass walls and ceilings infuses the space with a warm and inviting ambiance. This not only reduces the need for artificial lighting during the daytime but also positively impacts the mood and well-being of the occupants.

In urban environments, where limited access to natural light is often a concern, glass extensions provide an ingenious solution. By channeling sunlight into areas that would otherwise remain dimly lit, these extensions can transform previously underutilized spaces into vibrant, habitable zones. The interplay of light and shadow that occurs within a glass-encased environment adds an artistic dimension to the architecture, as the changing patterns throughout the day create an ever-evolving visual spectacle.

Harmonious Connection with Nature

In an era marked by urbanization and detachment from the natural world, glass extensions facilitate a renewed connection with nature. By erasing the boundaries between indoor and outdoor spaces, these structures encourage a seamless transition between the two realms. Residents can relish the changing seasons, witness the dance of raindrops, and bask in the golden hues of sunset – all from the comfort of their sheltered haven.

Furthermore, glass extensions foster a strong relationship with the environment by encouraging passive heating and cooling. During colder months, the sun’s warmth is harnessed and retained, reducing the need for excessive heating. Conversely, proper ventilation strategies can prevent the structure from overheating in the summer. This ecological mindfulness aligns with the growing emphasis on sustainable design and eco-friendly architecture.

Versatility and Functionality

Beyond their aesthetic allure, glass extensions offer remarkable versatility and functionality. These spaces can serve a multitude of purposes, from expanding living areas and creating inviting dining spaces to serving as tranquil home offices or art studios. The adaptability of glass extensions ensures that they cater to the unique needs and lifestyles of each individual or family.

Architects often incorporate innovative technology into the design of glass extensions, such as motorized retractable roofs, smart glass that can be tinted for privacy, and energy-efficient glazing systems. These technological advancements enhance the user experience while optimizing energy consumption and environmental comfort.

Conclusion

Glass extensions have redefined the boundaries of architectural design and the concept of interior space. With their seamless integration of nature, boundless light, and versatile functionality, they have become much more than mere structural elements. They are transformative experiences that meld the worlds of indoor and outdoor living. As architectural innovation continues to push the envelope, glass extensions stand as a testament to the harmonious coexistence of human ingenuity and the natural world.

Image: www.westmidlandsglazing.com

Contact us

Planning Permission

Retrospective Planning: A Guide to Successful Approval

Retrospective planning is a strategic process that involves seeking approval for changes to a project or development after work has already commenced. This practice is especially relevant in the fields of urban development, construction, and project management. Where unforeseen circumstances often necessitate adjustments to initial plans. In this article, we will explore the concept of retrospective planning, its benefits, and provide a comprehensive guide on how to successfully get retrospective planning approved.

Understanding Retrospective Planning

Retrospective planning, also known as retroactive planning, is the act of seeking approval for changes to a project that were implemented without prior authorization. This situation typically arises when the original plans encounter unexpected challenges or opportunities, prompting the need for modifications mid-stream. It can involve anything from altering building layouts, changing project timelines, or adapting to new environmental regulations.

Benefits of Retrospective Planning

  1. Adaptation to Realities: The world of project management is often marked by uncertainties and evolving circumstances. Retrospective planning allows projects to adapt to real-world challenges rather than adhering rigidly to outdated plans.
  2. Cost and Time Efficiency: By addressing unforeseen issues promptly, retrospective planning can prevent potential delays and costly disruptions that might arise if a project continues without adjustment.
  3. Improved Decision-Making: This process enables stakeholders to make informed decisions based on the current context, rather than relying on outdated assumptions.
  4. Enhanced Collaboration: Retrospective planning encourages collaboration among different teams and stakeholders as they work together to find the best course of action.
  5. Regulatory Compliance: Adapting to new regulations or guidelines becomes easier when project managers can retrospectively modify plans to align with updated standards.

Steps to Get Retrospective Planning Approved

  1. Identify the Need for Change: Recognize the necessity for retrospective planning by assessing if the current project circumstances deviate significantly from the initial plan. This could include changes in regulations, unforeseen challenges, or opportunities for improvement.
  2. Gather Data and Evidence: Collect relevant data, documentation, and evidence that supports the need for retrospective planning. This can include photographs, reports, or any other tangible proof of the reasons for change.
  3. Analyze Impacts: Thoroughly evaluate the potential impacts of the proposed changes, both positive and negative. Consider factors like cost, time implications, potential disruptions, and benefits.
  4. Engage Stakeholders: Communicate with all relevant stakeholders, including project teams, investors, community members, and regulatory bodies. Clearly articulate the reasons for the changes and the benefits they will bring.
  5. Develop a Comprehensive Proposal: Prepare a detailed proposal outlining the proposed changes, the reasons behind them, the anticipated outcomes, and the steps required for implementation.
  6. Mitigate Concerns: Address any potential concerns or objections that stakeholders might have. Provide solutions to potential challenges and explain how the changes will lead to a more successful project outcome.
  7. Submit the Proposal: Present your proposal to the appropriate authorities or decision-makers. This could be a regulatory body, a project oversight committee, or any other relevant entity.
  8. Communicate Benefits: Emphasize the benefits of the retrospective planning approach, including cost savings, improved project outcomes, and compliance with current regulations.
  9. Flexibility and Compromise: Be open to feedback and potential modifications to your proposal. Demonstrating flexibility and a willingness to compromise can go a long way in gaining approval.
  10. Highlight Lessons Learned: Discuss the lessons learned from the need for retrospective planning. This shows a commitment to continuous improvement and responsible project management.

Conclusion

Retrospective planning is a dynamic approach that allows projects to adapt to changing circumstances while maintaining efficiency and compliance. Successfully getting retrospective planning approved involves a comprehensive process of communication, evidence-based justification, and collaboration among stakeholders. By following the steps outlined in this guide, project managers and decision-makers can navigate the complex terrain of retrospective planning and ensure the best possible outcomes for their projects.

Planning Permission

Navigating Planning Appeals: Tips for Successfully Contesting Refusals

Firstly, the journey of securing planning permission for a construction project can often be intricate and fraught with challenges. While many applications are granted smoothly, there are instances when a proposal is met with a refusal from the planning authority. When this happens, all is not lost. Planning appeals provide a valuable opportunity for applicants to contest these refusals and present a strong case for reconsideration. In this article, we will explore the ins and outs of planning appeals. Along with practical tips to enhance your chances of success.

Understanding Planning Appeals

A planning appeal is a legal process that allows an applicant to challenge a planning authority’s decision to refuse permission for a proposed development. The process varies by jurisdiction but generally follows a similar structure. Here are the key steps involved:

  1. Grounds for Appeal: It’s important to understand why your application was rejected. Common reasons include concerns about the impact on the local environment. Insufficient details provided in the application, or conflicts with local planning policies.
  2. Submission Deadline: So, appeals must typically be submitted within a specified timeframe after the refusal decision. This varies depending on the jurisdiction.
  3. Preparing the Appeal: A well-prepared appeal is crucial. Gather all relevant documents, including the original planning application, correspondence with the planning authority, and any supporting evidence or expert opinions that strengthen your case.
  4. Appeal Statement: This is your opportunity to present a comprehensive case, addressing the reasons for refusal and demonstrating how your proposal aligns with planning policies. Be clear, concise, and organized in your arguments.
  5. Additional Information: So, depending on the specifics of your case, you may be required to provide additional information or updated plans to address the concerns raised by the planning authority.
  6. Site Visits and Hearings: Some jurisdictions conduct site visits and hearings as part of the appeal process. This is a chance for you to present your case in person and address any questions or concerns.
  7. Decision: The appeal is reviewed by an independent body or a planning inspector. They will consider all the evidence and make a decision, either upholding the refusal or overturning it.

Tips for Appealing Against Planning Refusal

  1. Thorough Research: Understand local planning policies and regulations that apply to your proposal. This knowledge will help you tailor your appeal to align with these guidelines.
  2. Engage with Experts: If your proposal involves technical or specialized aspects, consider consulting experts such as architects, environmental consultants, or traffic engineers. Their input can bolster your case.
  3. Address Concerns Directly: In your appeal statement, tackle each reason for refusal head-on. Provide clear and compelling arguments supported by evidence to counter these concerns.
  4. Clear and Concise Communication: Present your case in a coherent and easy-to-understand manner. Avoid jargon and technical language that could confuse the decision-makers.
  5. Visual Aids: Utilize diagrams, plans, and images to visually communicate your proposal. Furthermore, these aids can effectively convey your vision to the decision-makers.
  6. Demonstrate Public Benefit: If your proposal contributes positively to the community, emphasize these benefits in your appeal. This could include job creation, improved amenities, or enhanced aesthetics.
  7. Engage with the Community: So, if local opposition played a role in the refusal, engage with the community to address their concerns and highlight any modifications you’ve made to accommodate them.
  8. Maintain Professionalism: Keep all communications and interactions with the planning authority respectful and professional. A cooperative approach can influence the decision-makers positively.
  9. Be Open to Compromise: While it’s essential to uphold the core aspects of your proposal, be open to making reasonable changes that address specific concerns.
  10. Legal Assistance: In complex cases, seeking legal counsel or the advice of a planning consultant can provide you with valuable guidance and support.

Conclusion

Finally, planning appeals offer a second chance to secure approval for your proposed development, even after facing a refusal from the planning authority. By meticulously preparing your appeal, addressing concerns, and presenting a well-structured case, you can significantly enhance your chances of success. In addition, remember, persistence, professionalism, and a clear demonstration of how your proposal aligns with planning policies will play a pivotal role in influencing the decision-makers’ reconsideration.

Contact us

Permitted Development

Understanding the Distinction Between Prior Approval and Permitted Development

In the realm of urban planning and land use, two terms often crop up: “prior approval” and “permitted development.” While these terms might seem interchangeable at first glance, they actually represent distinct processes that play crucial roles in regulating and guiding development activities. Both mechanisms offer a balance between facilitating development and safeguarding the interests of the community and environment. This article aims to elucidate the differences between prior approval and permitted development. Shedding light on their significance within the realm of urban planning.

Permitted Development: Navigating Development Rights

“Permitted development” refers to specific types of construction, alterations, or changes of use that are granted an automatic planning permission by law, without the need for a formal planning application. This streamlined process allows for minor developments that have been deemed acceptable within certain parameters. The main goal of permitted development rights is to encourage smaller-scale developments that do not require a full planning process. Ultimately promoting flexibility and efficiency in the planning system.

Common examples of permitted development include small extensions, loft conversions, and certain changes of use. Such as, converting offices into residential spaces. However, it’s important to note that permitted development rights are not absolute. Local authorities can remove or limit these rights in specific areas through the use of Article 4 Directions, which means that even minor developments would require formal planning permission.

Prior Approval: Seeking Approval for Specific Aspects

Prior approval, on the other hand, pertains to a process by which developers must seek the approval of the local planning authority for specific aspects of a development that fall under permitted development rights. While the broader development might be considered acceptable under permitted development, certain factors like design, appearance, impact on the local environment, and infrastructure considerations require assessment and approval through the prior approval process.

For example, a developer might want to convert a commercial building into residential units, which is permitted development. However, the local planning authority might require prior approval for aspects such as the impact on transport and highways, contamination risks, and flooding. This process ensures that even developments granted permitted development rights are subject to scrutiny. Guaranteeing that potential negative impacts are addressed before construction begins.

Key Differences and Significance

Scope of Regulation: The fundamental difference between prior approval and permitted development lies in the scope of regulation. Permitted development focuses on the types of development that are automatically granted planning permission. While prior approval targets specific aspects of those developments that might have significant implications for the surrounding environment and community.

Assessment Process: Permitted development does not require a formal planning application, as the rights are automatically granted. On the other hand, prior approval involves a formal application process specifically for the aspects requiring approval. This process allows local planning authorities to assess and mitigate potential issues.

Flexibility vs. Scrutiny: Permitted development offers flexibility by streamlining the approval process for smaller-scale developments. Prior approval introduces an additional layer of scrutiny, ensuring that potential problems are addressed even within the context of permitted development.

Balancing Interests: Both mechanisms strive to balance the interests of developers and the community. Permitted development facilitates small-scale construction without overwhelming the planning system. While prior approval ensures that even streamlined developments meet certain standards and requirements.

In conclusion, the distinction between prior approval and permitted development lies in their focus and process within the urban planning landscape. Permitted development grants automatic planning permission for specific types of developments. While prior approval addresses specific aspects of those developments that require assessment and approval. Both mechanisms contribute to a nuanced approach to urban planning that seeks to accommodate development while safeguarding the interests of communities and the environment.

Contact us

Loft Conversion

A Simple Guide to Loft Conversion: Transforming Your Space

Are you looking to add space and value to your home without the hassle of moving? A loft conversion might be the perfect solution for you. Loft conversions have become increasingly popular in recent years. Offering homeowners a fantastic way to create a functional and stylish new living area within their existing property. In this guide, we’ll walk you through the essential steps of a loft conversion, helping you turn that underutilized attic space into a beautiful and practical part of your home.

Assess Feasibility

The first step in any loft conversion project is to assess the feasibility of the project. Not all lofts are suitable for conversion, so it’s essential to have a professional survey done to determine whether your loft space is suitable. Factors like the height of the loft, the pitch of the roof, and any structural considerations need to be taken into account.

Planning Permission and Building Regulations

In many cases, loft conversions can be done under permitted development rights, which means you won’t need planning permission. However, it’s crucial to check with your local planning authority to ensure that your project complies with any regulations in your area. Additionally, loft conversions are subject to building regulations, which ensure safety and structural integrity. Working with a professional architect or designer can help you navigate these regulations.

Design and Layout

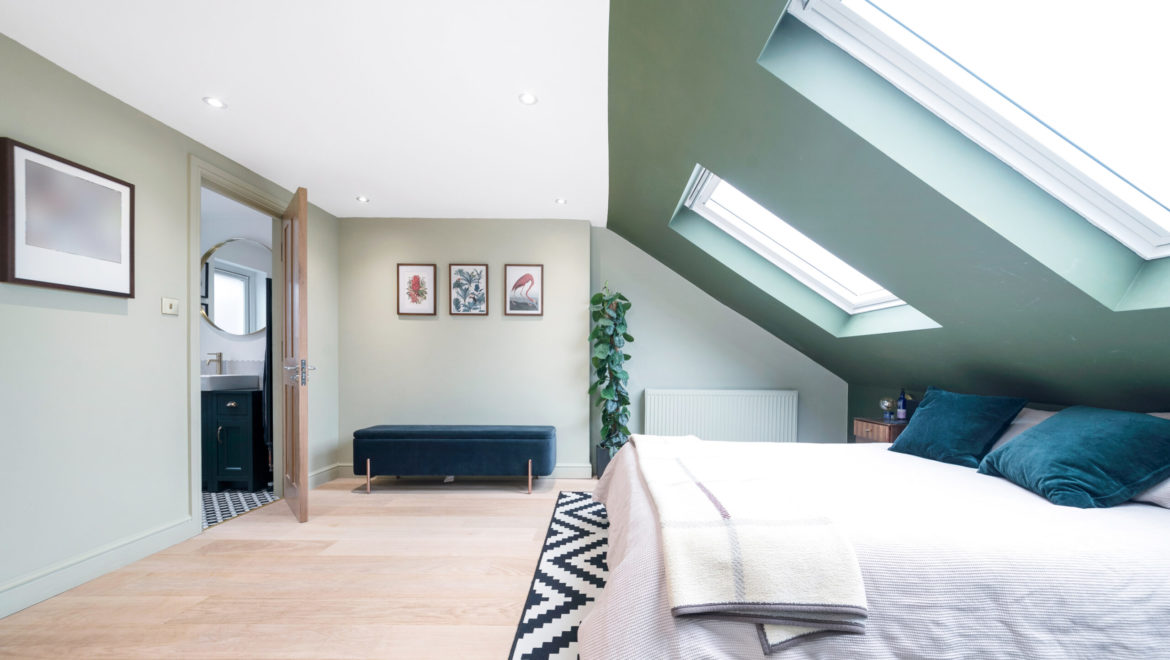
Once you have the green light to proceed, it’s time to think about the design and layout of your new loft space. Consider how you want to use the space – whether it’s an extra bedroom, a home office, a playroom, or a combination of functions. Keep in mind the layout, windows, lighting, and storage options that will best suit your needs.

Structural Changes

Depending on the existing layout of your loft and the desired final result, you might need to make some structural changes. This could involve reinforcing the floor, altering the roof structure, or adding dormer windows or skylights for more natural light. Consult with a structural engineer to ensure these changes are safe and compliant with regulations.

Hire Professionals

A loft conversion involves various trades, including architects, designers, builders, electricians, plumbers, and possibly even roofers. Hiring professionals who specialize in loft conversions is essential to ensure the project is completed successfully. They can guide you through each stage, provide expert advice, and manage the construction process.

Construction Phase

During the construction phase, your loft conversion plan will come to life. Builders will work on the structural changes, insulation, electrical and plumbing work, and interior finishes. Regular communication with your project manager or contractor is key to keeping the project on track and addressing any unexpected issues that may arise.

Finishing Touches

As the construction nears completion, it’s time for the finishing touches. Paint, flooring, lighting fixtures, and furniture will transform the space into a functional and visually appealing area. Consider using light colors and clever storage solutions to maximize the perceived space and create a comfortable environment.

Final Checks

Before moving into your newly converted loft space, make sure all necessary safety checks and inspections are carried out. This includes ensuring electrical and plumbing systems are up to code and that the space is properly insulated and ventilated.

Enjoy Your New Space

Congratulations, your loft conversion is complete! Whether you’re using it as a cozy bedroom, a serene home office, or a vibrant playroom, your new space is ready to be enjoyed. Take the time to add personal touches that reflect your style and make the space truly yours.

A loft conversion can provide a cost-effective way to enhance both the living space and value of your home. With careful planning, professional assistance, and attention to detail, you can transform your unused attic space into a functional and stylish area that meets your family’s needs for years to come.

Contact us

House Renovation

Creating a Disability-Friendly Home: Empowering Accessibility and Inclusion

A home is more than just four walls and a roof; it’s a haven of comfort, security, and self-expression. As society becomes increasingly aware of the diverse needs of its members, the concept of a disability-friendly home has gained prominence. Designing a space that caters to the needs of individuals with disabilities not only enhances their quality of life but also promotes inclusivity and a sense of belonging. In this article, we’ll explore the essential elements of creating a disability-friendly home.

Mindful Layout and Navigation:

A disability-friendly home begins with a layout that facilitates easy movement. Consider implementing an open floor plan that minimizes obstacles and allows for unobstructed navigation. Wider doorways, hallways, and clear pathways can accommodate mobility aids like wheelchairs and walkers. If steps or stairs are present, installing ramps or lifts can be crucial for those with mobility challenges.

Accessible Entrances:

The entrance to a home should be universally welcoming. Installing a ramp with a gentle slope, non-slip surfaces, and handrails can make entry smoother for wheelchair users or individuals with limited mobility. Lever-style door handles are easier to operate than traditional knobs, providing a more accessible option for those with dexterity issues.

Adaptive Technology:

Incorporating smart home technology can greatly enhance accessibility. Voice-activated assistants, smart lighting, and automated thermostats can be controlled without physical effort, benefiting individuals with mobility, vision, or cognitive impairments. These technologies not only make daily tasks easier but also foster independence.

Bathroom Accessibility:

The bathroom can pose significant challenges for individuals with disabilities. Installing grab bars near the toilet and in the shower can provide much-needed support. A roll-in shower with a bench, a handheld showerhead, and non-slip flooring can create a safe bathing environment. Lever faucets and easily accessible storage solutions ensure a more user-friendly experience.

Kitchen Adaptations:

A well-designed kitchen can promote independence in daily tasks. Lower countertops, pull-out shelves, and easily reachable storage can make cooking and meal preparation more manageable. Installing appliances at appropriate heights and considering clearances for wheelchair users are essential steps toward inclusivity.

Flooring Considerations:

Flooring plays a significant role in accessibility. Opt for smooth, slip-resistant surfaces throughout the home. Eliminate thresholds or use gradual ramps between rooms to prevent tripping hazards. Carpeting should be low-pile to ease mobility aids’ movement.

Color and Contrast:

Consider using color and contrast strategically to aid individuals with visual impairments. High-contrast elements, such as dark doorframes against light walls, can make doorways more noticeable. Braille labels on switches, appliances, and doors can further enhance accessibility.

Comfortable Furniture:

Investing in comfortable and supportive furniture is crucial. Chairs and sofas with appropriate height and cushioning facilitate easy seating and rising. Additionally, furniture arrangement should allow enough space for wheelchair maneuverability.

Communication and Safety:

Emergency communication is vital for everyone. Install smoke detectors with flashing lights or vibrating alarms for those with hearing impairments. Ensure clear communication methods are available, such as whiteboards or communication boards for individuals with speech difficulties.

Personalization and Empowerment:

Ultimately, a disability-friendly home should reflect the individual’s preferences and needs. Involve the person with disabilities in the design process to ensure the space is tailored to their requirements. This personal touch empowers individuals and fosters a sense of ownership.

Creating a disability-friendly home is not only a matter of physical adjustments but also a commitment to social inclusion. By embracing thoughtful design principles and considering the unique needs of individuals with disabilities, we can create spaces that prioritize accessibility, comfort, and empowerment. As we continue to move towards a more inclusive society, the concept of a disability-friendly home stands as a testament to our dedication to ensuring that every individual feels valued and respected in their living environment.

Contact us

House Extension

The Cost of Home Extensions in the UK: A 2024 Outlook

As the year 2024 unfolds, the prospect of home extensions remains an exciting endeavor for many homeowners in the United Kingdom. The desire to expand living spaces, accommodate growing families, or create additional functional areas continues to drive interest in home extension projects. However, one of the primary considerations that homeowners grapple with is the cost associated with such undertakings.

The cost of a home extension 2024 can vary widely based on a multitude of factors. These factors can include the size of the extension, the materials used, the location of the property, the complexity of the design, and the choice of contractors. It’s important for homeowners to approach the budgeting process with a clear understanding of these variables to make informed decisions.

Size and Complexity of the Extension

The size and complexity of the extension are major determinants of cost. Generally, larger extensions will require more materials and labor, leading to higher costs. Additionally, the complexity of the design can influence the overall price. Intricate designs, unique architectural features, and special requirements can add to the project’s complexity and subsequently increase costs.

Materials and Finishes

The materials chosen for the extension play a significant role in the overall cost. High-end materials, such as premium hardwood, stone, or specialized glass, will generally result in a higher budget. Homeowners have the option to select materials that align with their design preferences and financial considerations. Balancing aesthetics and durability can help in optimizing the project’s cost.

Location of the Property

The geographic location of the property can significantly impact the cost of a home extension. Construction costs can vary between regions due to differences in labor rates, supply chains, and local regulations. For instance, extensions in London and the South East of England may be more expensive compared to other parts of the country.

Labour and Professional Fees

Labor costs, including those for builders, contractors, architects, and other professionals, are a substantial component of the overall budget. Experienced and reputable professionals often come at a higher price, but their expertise can lead to a smoother project execution and a more satisfactory outcome.

Permits and Regulations

Homeowners should also consider the cost of obtaining necessary permits and complying with local regulations. Depending on the nature of the extension, planning permissions and building regulations approvals may be required. These processes can involve application fees and other expenses.

Utilities and Services

If the extension requires the installation or extension of utilities such as plumbing, electricity, and HVAC systems, these costs must be factored in as well. Connecting these utilities to the existing systems can add to the overall project cost.

Estimated Costs

As of 2024, estimating the precise cost of a home extension in the UK can be challenging due to the aforementioned variables. However, for a rough idea, a basic single-story extension might start from around £1,200 to £1,500 per square meter, while a more complex two-story extension could range from £1,500 to £2,500 per square meter or even higher.

It’s important to keep in mind that these estimates are subject to change and can vary widely based on location, materials, design intricacies, and individual preferences. Homeowners are strongly advised to obtain detailed quotes from multiple contractors and professionals before embarking on an extension project.

Budgeting and Planning

To embark on a successful home extension project, homeowners should begin by setting a realistic budget and conducting thorough research. Obtaining quotes from various contractors, seeking recommendations, and understanding the local construction landscape can provide valuable insights into the potential costs involved.

In conclusion, while the cost of home extensions in the UK can vary greatly based on numerous factors, careful planning, budgeting, and selecting the right professionals can help homeowners achieve their desired extension within their financial means. As the year 2024 progresses, the allure of expanding living spaces remains within reach for those who approach the process with diligence and foresight.

Contact us