Tag: architect

Advice Center

An informative step-by-step guide to installing a roof

This step-by-step guide will show you how to install a roof. It will also list tools and items that you would need during this project.  

List of tools required –  

  • Caulk gun 
  • Air compressor 
  • Circular saw 
  • Roof harness  
  • Roofing Nailer 
  • Scaffolding  
  • Stapler  
  • Utility knife  
  • Cordless drill 
  • Tape measure  
  • Chalk line 

List of materials required –  

  • Felt underlay  
  • Asphalt shingles  
  • Roofing nails  
  • Drip edge  
  • Hook blades  
  • Sealant 
  • Waterproof underlay  
  • Staples  
  • Step and dormer flashing  
  • Valley flashing  
  • Vent flashing  

Step 1: installing the ventilation system  

A rafter roll is usually laid across the eaves and is designed to guide fresh air into the roof. It also allows air to circulate around the space to prevent dampness.   

What is a rafter roll? 

A rafter roll is a glass mineral wool roll. Designed for use in warm roofs where the roof is insulated at rafter level. It offers excellent thermal performance.  

Make sure the rafter roll comes out above any pre-installed insulation. If you don’t the insulation will block the airflow.  

Step 2: installing underlay  

To protect the roof against ice, wind, and rain you should install a good underlay. You need to make sure the underlay you have chosen meets the building regulation requirements for your project. So, to install the underlay you should start on the right side of the roof and tack it into place. Depending on your ventilation system, you may need to leave a gap at the ridge of the roof to allow air to circulate effectively.  

Step 3: putting in the battens and tiles  

You will need to determine the first fix point on the roof for your tiles, and that’s where the top of your first batten will sit. In addition, make sure you use the right size timber batten for your roof tiles. Line up the top of the batten with the chalk line and fix with a nail to every rafter. After that, to keep the ridge batten secure you must use batten straps to keep it in place.  

What is a batten?  

A Batten is a small section of timber or steel that provides a means of supporting, positioning, or fixing roof cladding and ceiling sheets. A Tile batten is parallel to the eaves line and at right angles to the rafters to which tiles are fixed

Next, you should lay your first line of tiles across the roof. Then, make sure that you have a minimum of one nail per tile and two nails per tile around the perimeters. You should time from right to left, depending on the interlock of the tile.  

Finally step 4: adding the roof ridge 

You should place your ridge membrane in a straight line across the ridge batten. Once it’s secured all along the ridge, it’s time to screw the ridge tiles to the ridge batten. Finally, when that is completed, you can install a ridge-to-ridge seal to offer extra strength to the ridge.  

Contact us

Loft Conversion

The best 2022 guide to a Velux loft conversion

If you’re looking to gain extra space in your home, and want to add value to the property, then a loft conversion can be a great solution.  

What is a Velux loft conversion? 

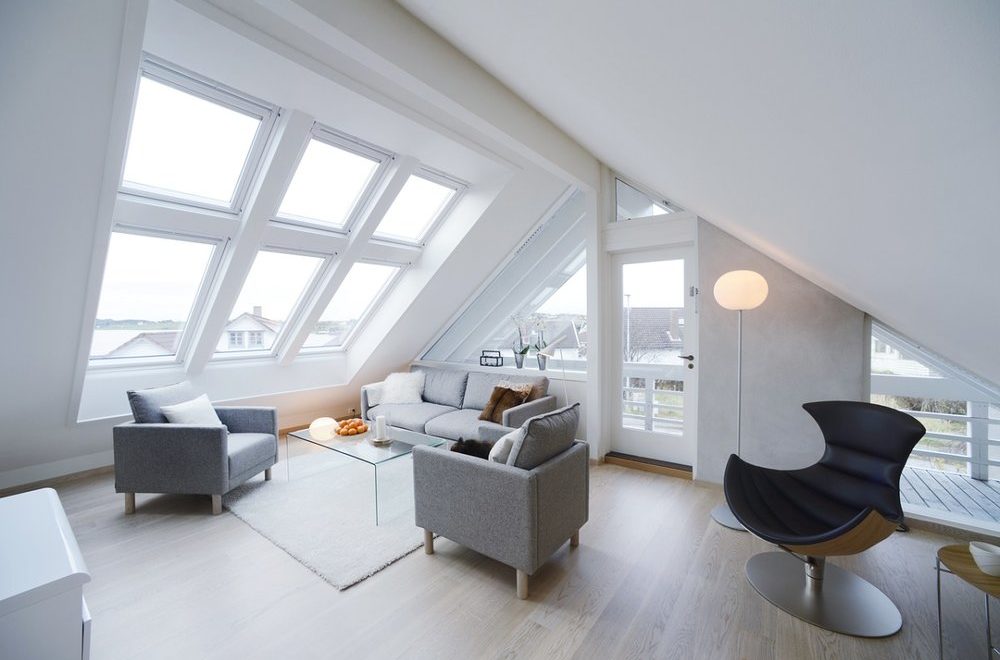
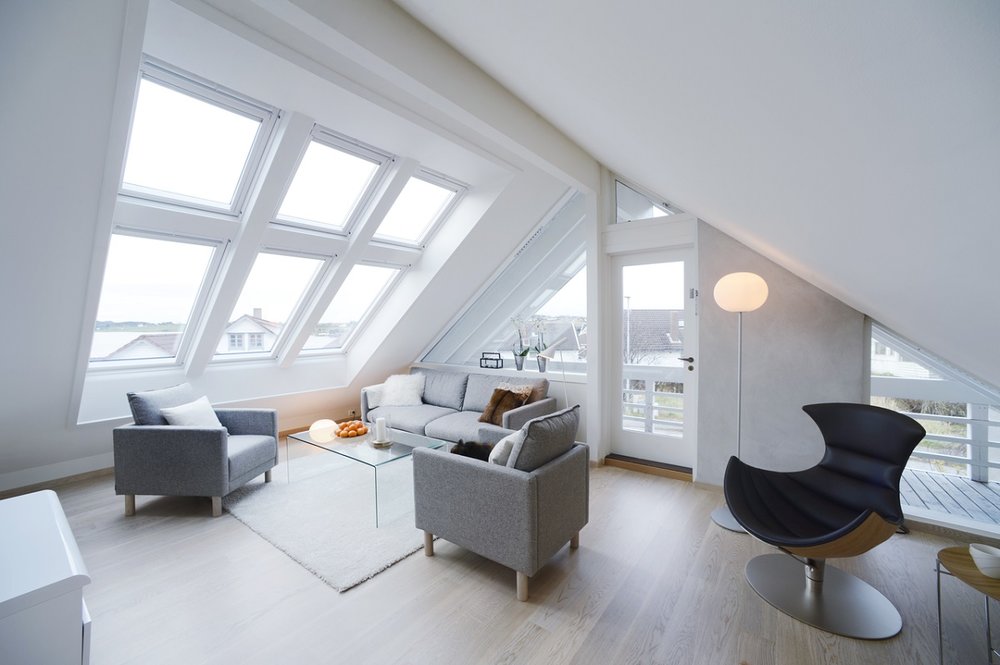
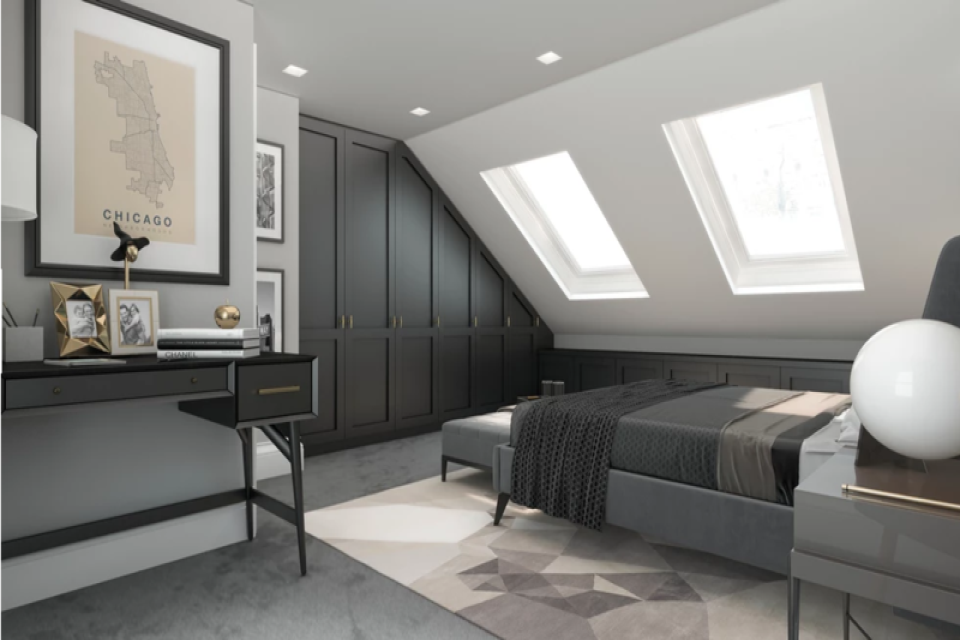
A Velux loft conversion is when the shape of the existing roof is retained and Velux windows are installed into the rafters. The rafters will have to be cut depending on the size of the new windows, the inside of the roof space is fitted out to a carefully thought-out design. The name Velux is after a famous brand of loft windows.   

Will you need planning permission?  

Most loft conversions are considered permitted development, which means you won’t need to get planning permission as long as the building work fits certain criteria. So, if you’re looking to get a simple conversion with roof windows, you generally don’t need to worry. However, it is best to check just to be safe.  

How long does a this loft conversion take to complete? 

Velux loft conversions are usually completed in between 4 and 6 weeks since they are one of the simplest conversion types. 

Cost of a Velux loft conversion –  

The average cost for a Velux loft conversion is around £27,500. However, there are various things that will affect the cost such as: 

  • Size of windows 
  • Number of windows required 
  • Type of windows 
  • Head height and space of your loft 
  • Where you live 
  • Style and quality of finishings  

Velux windows –  

A Velux window is easier to install than a dormer window, and still provides a good amount of light to the space. The windows are paired with a number of modern features, such as: 

  • Electric operation  
  • Solar operation 
  • Top hung hinges  
  • Hundreds of blinds and shutter options  
  • Extra-large balcony windows 

How they can transform your home? 

Compared to other loft conversions, Velux requires less construction and hence low cost. The main addition in the loft will be the Velux windows to transform the space. Many of our clients have used this extra space for: 

  • Bedroom 
  • Home Office 
  • Living Room 
  • Bathroom 
  • Entertainment Room 

You see, there are lots of possibilities to transform this unliveable place into something useful for the whole family. Furthermore, the windows in the loft will allow for more natural light and ventilation. If you are living in a warm area, then you can use glass that prevents sunlight from entering. 

Contact us

Advice Center

How close can you build to your boundary line?

When planning a home extension or garden, it’s important to consider if planning permission is required. And then how close to the boundary line the build will be.  

What is a boundary line?  

A boundary is a line that divides one area from another. It may be called a border and defines the extent of one or more areas that are adjacent or in close proximity. Boundaries can be defined physically by coastlines, rivers, roads, walls, fences, and lines painted on the ground.  

How close to your boundary can you build? 

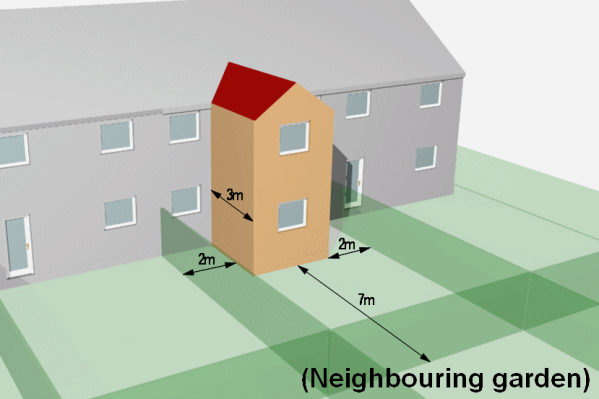
If you’re planning on building an extension of more than one storey, you cannot go beyond the boundary at the rear by more than 3 meters. However, this only applies when there is no other property on the land to the rear of your home.   

A general guideline shows that a build that reaches 2.1 meters is considered acceptable and anything over that  

How close can you build to the neighbour’s boundary?  

The party wall act allows an absolute right to build-up to the boundary between you and your neighbour. It also allows you to build astride the boundary line, but only with your neighbour’s consent. 

A householder planning application may be required, which takes into account the opinions of neighbours and any other parties that may be affected by the new build. You should talk with your neighbours throughout the process to reduce the risk of them rejecting any proposal.  

What is the process for building on the boundary (party wall)? 

If you want to build a wall or garden wall astride the boundary wall, you must tell your neighbour. You can do this by serving a notice, called a party wall notice. You must also inform the adjoining owner if you plan to build a wall only on your land but up against the boundary line. However, if you have a party wall agreement, your neighbour can’t prevent you from building such a wall.  

Permitted development boundary lines –  

If the proposed build falls within permitted development rights, then the council must approve it. As long as it meets the required regulations. For example, a detached new build must have a maximum eaves height of 3m and a total maximum height of 4m.  

Contact us

Extensions

Everything there is to know about wraparound extensions

A wraparound extension is a great way to add space to the rear of the house for an open-plan design. Here’s what you need to know.  

What is a wraparound extension?  

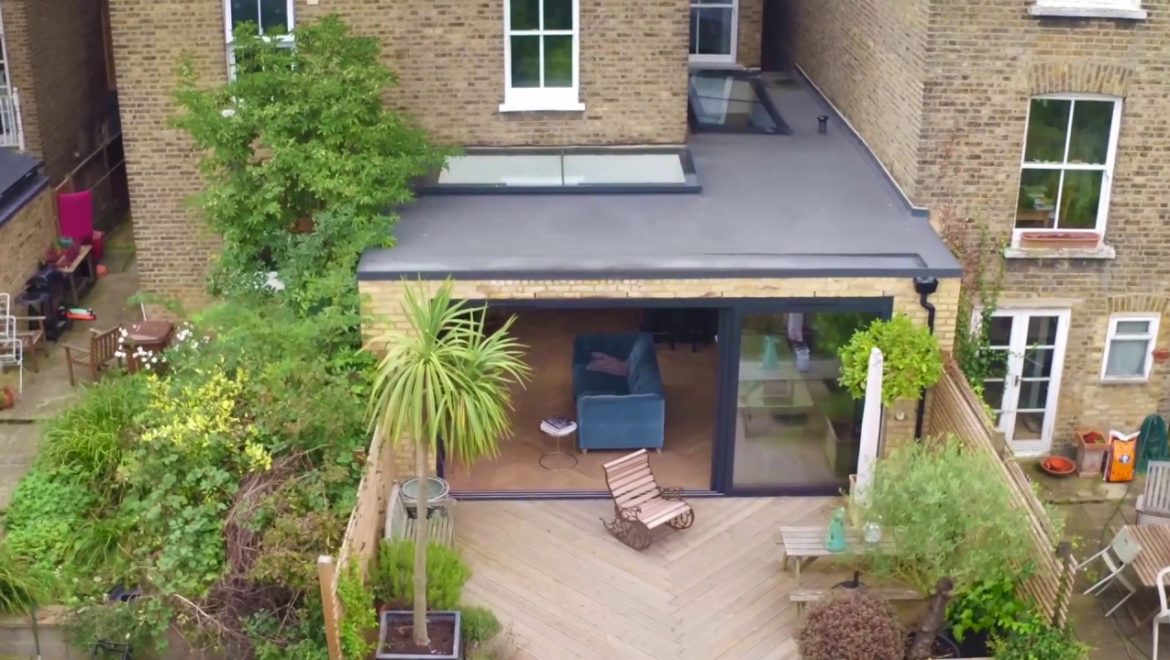
Wraparound extensions are essentially a hybrid of side and rear extensions which form an L-shape at the back of the property. By maximising the space to the side and extending to the rear, the wraparound extension gives you an impressive extension that will transform how you live.  

Why choose a wraparound extension?  

With this type of extension, you can extend into the side alley of your house, if you have one. Meaning you won’t have to extend that far into your garden, which is ideal for people who have a small outside area.  

Here are some other advantages of an L-shape extension: 

  • Opens up your kitchen area 
  • Brings more light into your home 
  • Plenty of design options 
  • Allows better connection to the garden 
  • Allows space for new rooms.  

Would you need planning permission?  

It is likely that you would need planning permission for a wraparound extension. While a small side return extension and a rear extension may be possible under permitted development, there might be restrictions for joining them together.  

Permitted development rules that would apply to both the side and rear elements of wraparound extensions include: 

  • You can extend a detached property by 8m to the rear if it’s a single-storey extension. (6m for a semi or terraced house) 
  • An extension must not result in more than half the garden being covered 
  • Side extensions can only be single storey with a maximum height of 4m and a width no more than half of the original building.  

How much do they cost?  

There is no set price for a wraparound extension because every project is different and the costs vary. Averagely in London, you are looking at paying around £75,000 to £145,000, and outside of London, you can expect to pay £60,000 to £120,000.  

A few factors which will vary the prices are:  

  • Materials used. Some materials are more expensive to build with, due to their quality and accessibility.  
  • Structural work. The more structural work you have for your project will increase the construction budget.  
  • Contractors. Individual contractors are cheaper. However, they can be slower without the access to additional resources and relationships that you would like larger companies.  
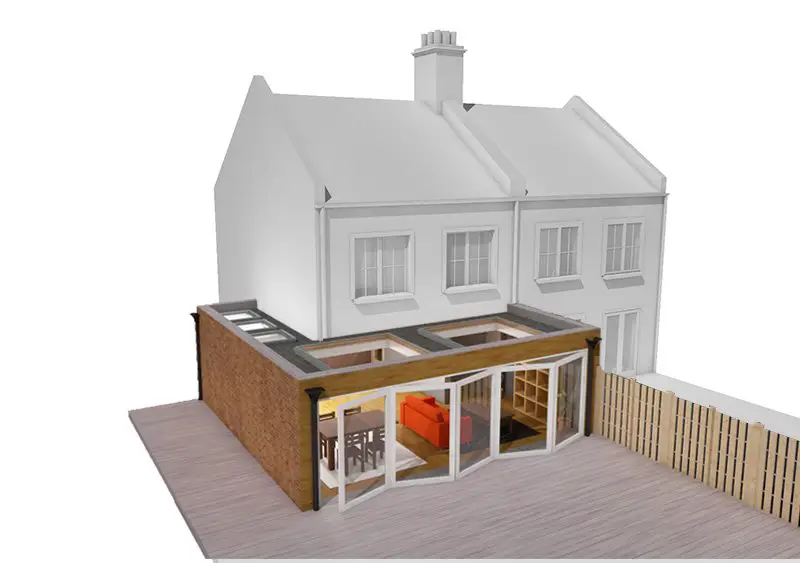
How much does a wrap around extension cost? // Wrap around single storey  extension

Contact us

Architecture & Building

How much does it cost to build a new house in 2022?

Buying your first home is exciting, so just imagine the excitement of building your first home. Self-builds are becoming a popular trend in the UK, with more homeowners opting to build rather than buy. However, you should know how much your dream house is going to cost.  

Build cost factors –  

Here are several key factors which can affect the cost of building a house:  

  • Size 
  • Location 
  • Build quality 
  • Complications  
  • Design complexity  
  • How many storeys  
  • Professional services required 

Size of the house –  

The price of your project can vary majorly depending on the size and design of your proposed house. A great way to get a general estimate is to think about the cost to build a house per square metre. Averagely in the UK, you can expect to pay anything from £1,500 – £3,000 per m2.  

Location of where you want to build –  

The prices of building a house differ widely depending on the location. However, the closer to London you decide to build the more expensive the project will be. Central London is the most expensive area to build in, in the UK and the second-highest priced in the world. If you are looking for the cheapest areas in the UK to build a home, you should look in the North West and Scotland. Prices average between £99,000 – £160,000 for a new build.  

Build quality –  

The materials you choose to use and the finish you want will have a big impact on the price of your project. However, the prices of materials have been increasing rapidly over the last year and in 2022. This is because of a supply and demand issue caused by lockdowns and Brexit. This means you may have to pay a little extra for certain materials. 

Complications –  

When it comes to a new project it is always good to have a plan and a budget just in case anything goes wrong. There are many potential complications that can arise during a build. This can happen during the planning stage, or when the building work is underway, which is why it is important to have a contingency plan.  

Design complexity –  

It is common knowledge that the more complex your design is, the more the price will increase. More complex designs take longer to build meaning you will need to pay more for contractors. Also, your architect’s fees will be higher because they have to spend more time on your drawings.  

The number of storeys –  

The more storeys you design your property to have, the more the price will increase. A single-storey property will be cheaper to build than a two or three-storey house. However, the size, shape, and location of the plot will decide how many storeys you can build. 

Professional services –  

You will also need to budget for an architect, project manager, and contractors. The industry’s standard fees for professional services range from 1% to 15% of the total cost, depending on the scale of the job.  

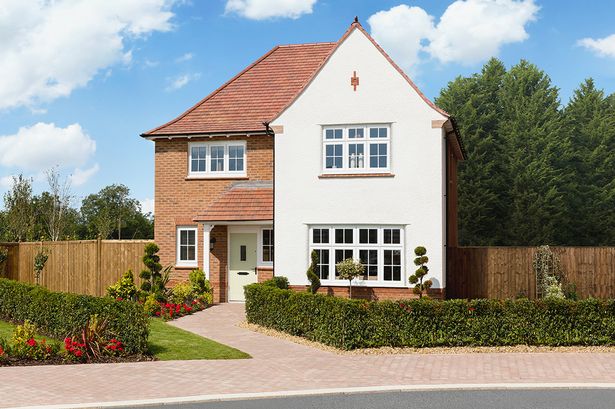
Image: https://www.redrow.co.uk/houses/cobden-gardens-hauxton-meadow-222361/cambridge-dcc4
Architecture & Building

Understanding the anatomy of a roof part 2

When it comes to the roof of your home, there are quite a few components. Here you can gain an understanding of all of the details that make up a roof.   

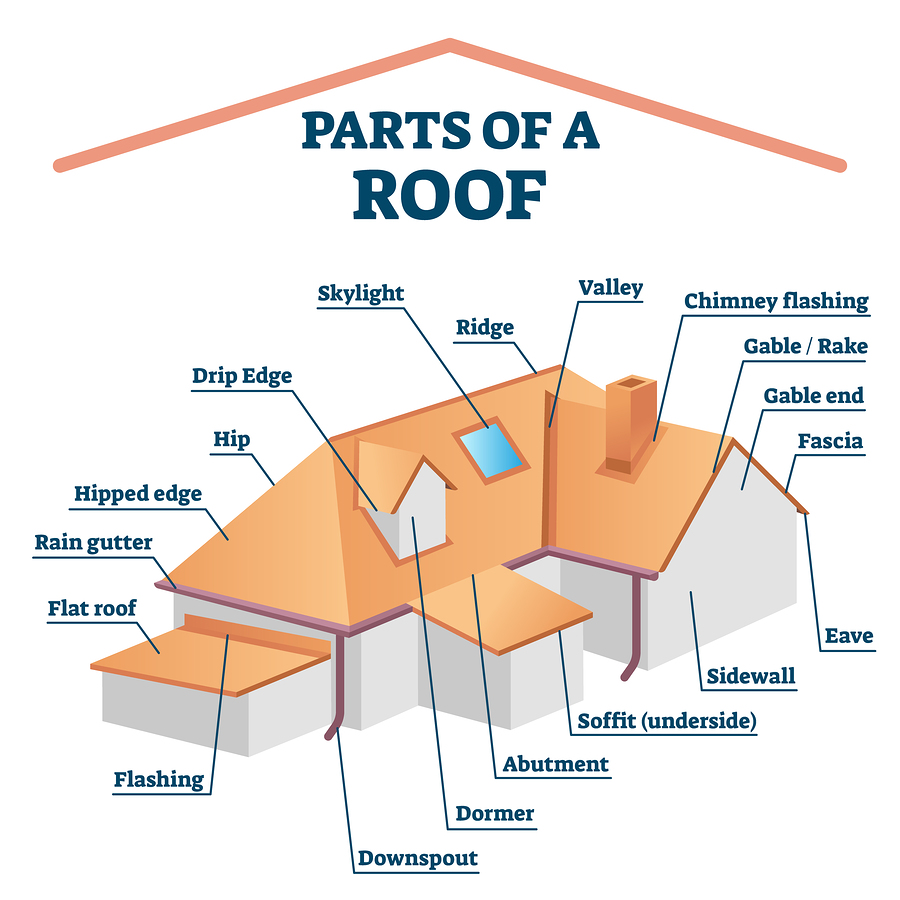
Fascia –  

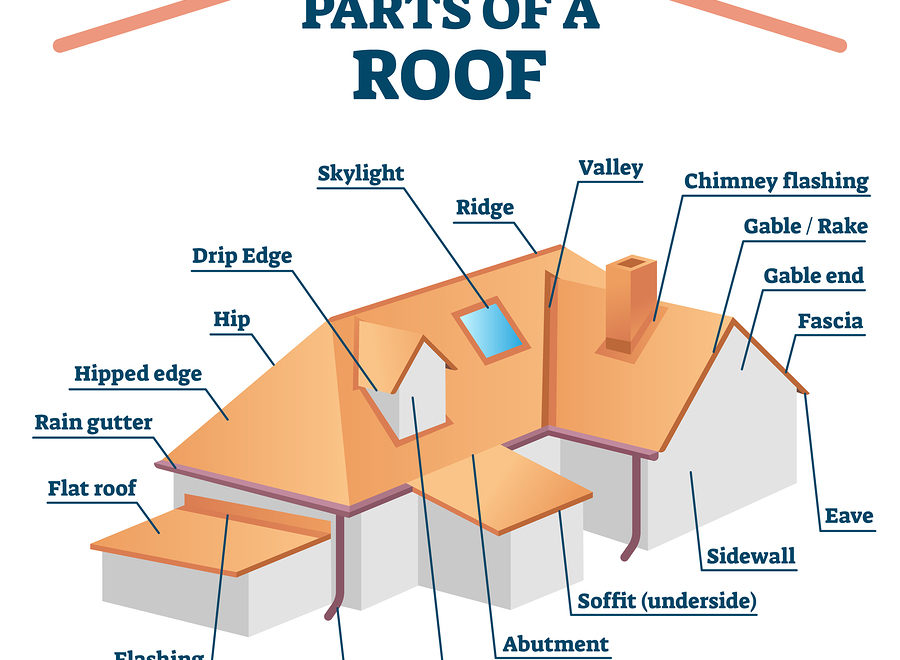
Firstly, a fascia is the attractive board along the side of the overhang and helps your roof appear finished. They are used to secure the gutters to the roof and keep them in place. Fascias also block water from penetrating the roof deck and coming into your home.  

How is a fascia attached? The fascia board is nailed to the rafter feet and usually has a rebate or lip for the soffit boards to slot into. They are then either fixed to a batten that is attached to the brickwork or sat on top of the last course of brickwork.  

Soffit –  

The soffit is the part of the overhang where your roof meets your siding. When rain or snow hits your roof, it runs down, and the overhang allows the water to flow away from your house. Soffit outlining the roofline allows for continuous ventilation and is one of the most effective ways to ventilate a loft.  

Where is the soffit on a house? The soffit is the material beneath the eave that connects the far edge of your roof to the exterior wall of your house. Besides being underneath your eaves, soffits can also be on the underside of a porch.  

Gutters –  

Guttering is a small thin trough that is used to collect water from your roof and completes the roofing protection system. It is used to direct rainwater away from the base of the building which helps protect the foundation. For a house to be complete, it needs a gutter system to function properly.  

Downspout –  

A downspout is a lightweight tube that extends vertically from the gutter trough to the ground. They exist to direct excess rainwater away from your home in a controlled manner. In addition, it is an important element of any gutter system that helps prevent soil erosion and damage to the property’s foundation.  

Flashing –  

Finally, flashing is a crucial roofing material that every roof needs to have. It is a sheet of thin metal material used to prevent water penetration or seepage into a building. Without flashing a roof would almost certainly develop leaks in sensitive areas.  

Contact us

Loft Conversion

Adding a dormer to an existing loft conversion

There are two reasons why people may want to do this: 

  • People buy a house with an existing roofline conversion and decide they want to upgrade the loft accommodation. They might do this to make the space larger, brighter and, perhaps change the interior usage.  
  • Secondly, the loft conversion is planned in two stages to spread the cost. Or because the demand for accommodation at that time is satisfied with a simpler roofline conversion. 

What is a dormer loft conversion? 

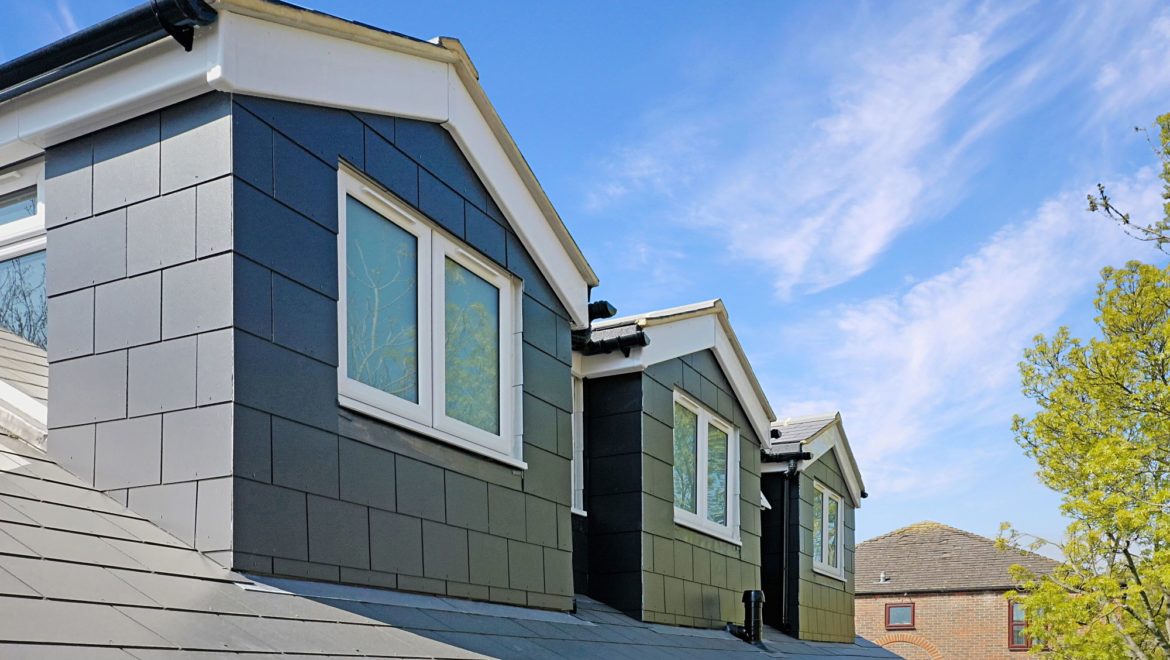
A dormer is a box-like structure with vertical walls which come out from the roof slope. They can vary in size and style. In addition, dormers are commonly used to increase the usable space in a loft and to create window openings in the roof.  

Do you need planning permission to add dormers to an existing loft conversion? 

The same planning deliberations will apply to the upgrade just like if you were to start from scratch. If your loft conversion was built under permitted development, you shouldn’t assume that the dormer you’re adding will be as well. So, some points that may make you need planning permission are: 

  • How far the dormer windows project from the roof 
  • Whether the property is listed or in a conservation area.  
  • How much structural change is made to the appearance and height of the existing roof.  
  • The overall size of the loft conversion, the upgrade could make the conversion larger than the original design.  
  • Your neighbours are affected by your dormer. Either by being over shadowed or over looked.  
  • The dormer exceeds 40 square meters on a terraced house or 50 square meters on a semi-detached or detached house.  

Although, not all dormer conversions require planning permission. Your builder or architect will be able to advise you on whether your plans fall within permitted development rights.  

Advantages of adding a dormer –  

Dormer loft conversions are one of the most popular options when it comes to loft conversions. So, here are some advantages of adding them:  

  • They are suitable for almost every type and style of house. 
  • Dormers increase the head height and usable floor space.  
  • You can use any type of window to match the property. You aren’t confined to Velux windows or roof lights.  
  • Could add a small Juliet balcony 

How much would it cost?  

Finally, if you already have an existing loft conversion and you want to add a dormer, you should expect to pay upwards of £5000. However, this all depends on the size, style, and other factors when it comes to a dormer.  

Image: Nuprojects.co – Eige arbeid

Contact us

Architecture & Building

How much does it cost to build Annexe?

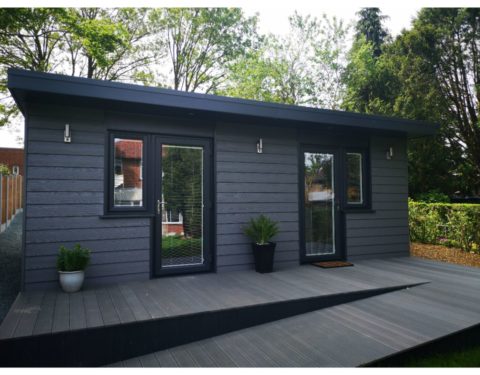
Firstly, a garden annexe can transform a family’s life. By giving the person living in the building closeness to their loved ones. Whilst maintaining the privacy of having their own space. It provides the best of both worlds, especially if the main property doesn’t have the space or privacy required to accommodate a family member.   

What is an annexe?  

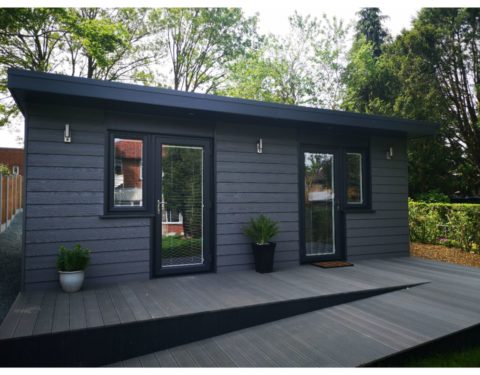
An annexe is a building joined to or associated with the main building, providing additional space or accommodation. It’s a self-contained living space featuring a kitchen, bedroom, and bathroom. In addition, the outbuilding can be attached to the main property or housed in a converted outbuilding.  

Will you need an architect? 

While an architect isn’t essential when it comes to building an annexe because it is a project that you can DIY. However, you may want to hire an architect to help you with the planning and positioning process to make sure your project is legal and safe.  

Planning rules –  

An annexe is usually considered to be an outbuilding, which is defined as being incidental to the use of the property. This is important as it will dictate whether you need planning permission.  

The local authority is likely to have concerns over things such as:  

  • The overall size of the annexe in relation to the main house and size of your garden. 
  • The specification of the living accommodation needs to be considered ancillary to the main house to be an annexe.  
  • They will want to know the reason you want to build an annexe. And what long term plans you have for it.  

How much does it cost to build?  

On average it is estimated to cost between £68,000 to £140,000 to build an average-sized one. An annexe is known to add as much as 20-30% value to the property, so it is a great investment. People have also been known to rent out their annexes, which can be a good thing because the property owner is getting some more income.  

Contact us

Conversions, Extensions

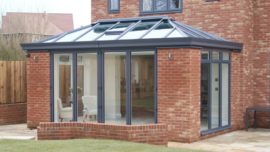
Are Timber frame orangeries worth building? Here’s what to know

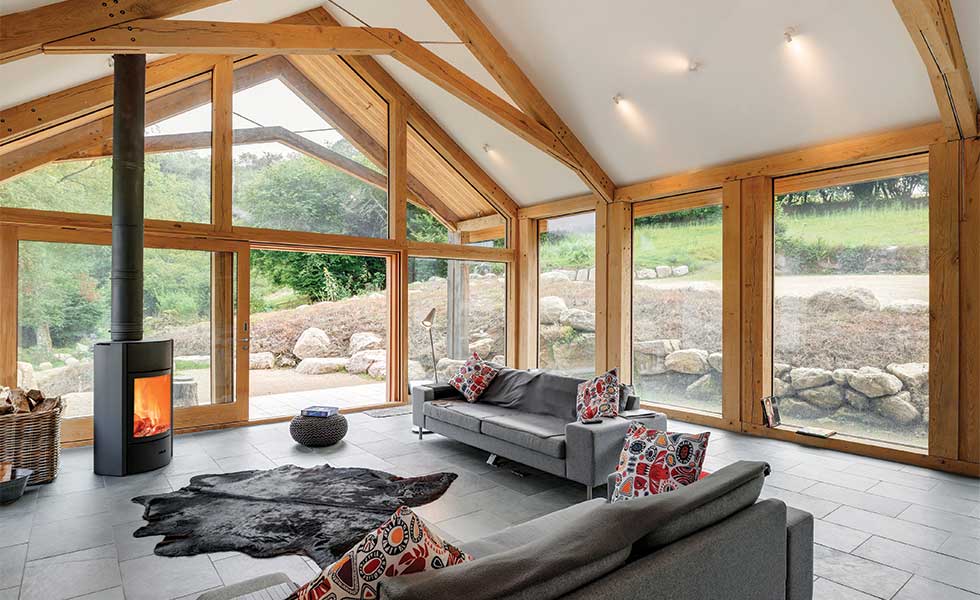
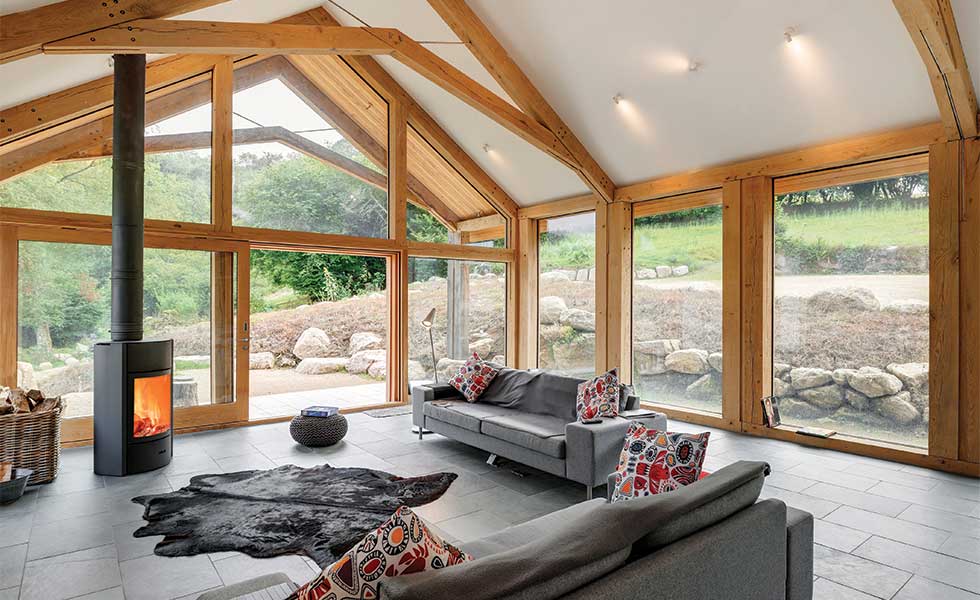
Timber frame orangeries are an excellent choice if you require the light and spacious feeling of a conservatory, but want the warmth and solid structure of a brick extension.  

What is a timber frame orangery?  

A timber orangery consists of timber window frames, doors at the sides, and sometimes separate timber glazed roof lanterns built-in.  Some experts like to use the 75% rule. If the extension has less than 75% glass it is classed as an orangery rather than a conservatory. Orangeries tend to have a brick base or more brickwork than a conservatory.  

Do you need planning permission for an orangery?  

An orangery can be seen as halfway between a conservatory and an extension. It’s an extended space that has the insulation of brick walls but the benefit of lots of light and good views.  

For planning purposes, an orangery is considered a single-story extension on and has the same building regulations as an extension. However, you won’t need planning permission for an orangery if you build within permitted development. 

Advantages and disadvantages of a timber orangery –  

Here are some of the main advantages of a timber orangery –  

  • Can be built to exceed 60-year design life  
  • Fast heating due to low thermal mass 
  • Energy efficient when constructed 
  • Quick build time 
  • Reduces site labour 
  • Recyclable  
  • Renewable 
  • Reduced construction waste 

And here are some disadvantages –  

  • Acoustics  
  • May decay when exposed to excessive moisture 
  • Subjected to risk of fire  
  • Lack of experienced builders and erection crews 
  • Transportation and carriage access  
  • Deficiency of site quality control 
  • Requires regular maintenance  

How much will a timer frame orangery cost?  

Building an orangery is often cheaper than building a single-storey extension based of a structure that is similar in size. Orangeries are one of the most affordable ways to create more space.  

As of 2021, the average price of an orangery stands around £19,000. Although, because of the material shortage wood has become a bit more expensive. This means the average price can be from £20,000 onwards.  

However, orangeries are a good investment because they can increase the value of your home. They are known to add around 11% more value to your property.  

Orangeries aren’t just for the summer –  

In addition, how you use your orangery is completely down to you. However, they have so much more potential than just being a sunroom, it is an improvement to the heart of your home. They are perfect spaces for entertaining and hosting friends and family all year round. 

Photographs: Richard Downer Photography
House Renovation

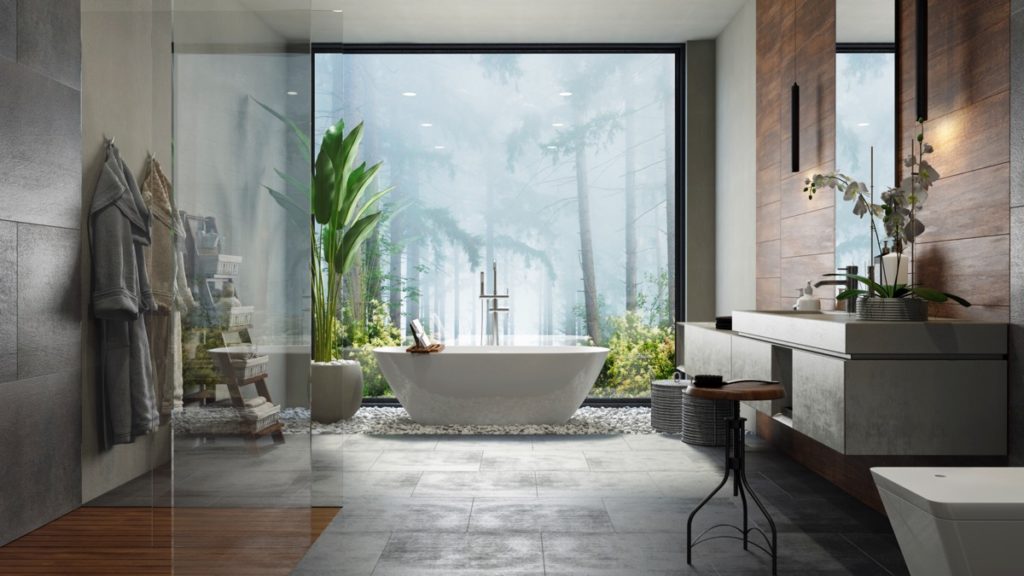
Bathroom Renovations: Things to Consider

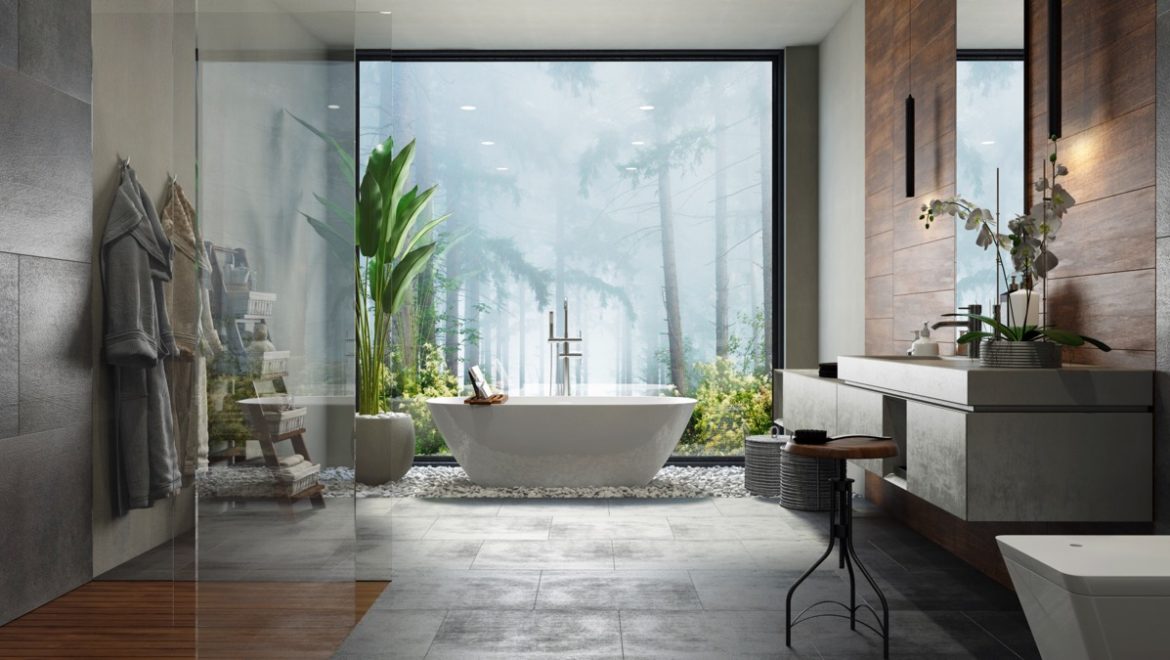
Bathroom renovations gives you the chance to refresh your bathroom and make sure it’s perfect for you. A more efficient bathroom will save you money in the long run and reduce strain on the environment. 

Bathroom renovation cons 

The effect on your home.  

When renovating your bathroom, it will have a huge effect on your household. The process of remodelling can become a nightmare for you and anyone else in the household, especially if it goes wrong.  

Its costly  

Bathroom renovations are never cheap, especially bathrooms. If you’re wanting to completely remodel, you’ll need to know the costs if toilets, bathtubs, showers, sink and any other maintenance that will be needed. Other factors you will need to consider is tiling, mirrors, plumbing and painting expenses. Also, you will need to be aware of any outdated or broken pipes as you will need to replace them. Before you start renovating you should create a budget, and make sure it’s realistic.  

Time  

It doesn’t matter what you plan, the timeline to this project is out of your control. Sometimes small or large problems will appear that needs to be dealt with, the labourers may not be as punctual as you thought. Therefore, don’t expect your planned 2-week renovation to take the correct time as it will most likely take longer. 

Bathroom renovation Pros 

Increase hoe value  

Renovating your homes bathroom can add value by 5% of your homes buying price. Visitors that are looking to buy will appreciate a modern and contemporary appearance compared to an outdated design. Remember, newer features, pluming and design will attract more buyers if your wating to see your home. 

Your dream designs 

When remodelling you get to decide exactly what it will look like and everything that will go with it. For example, you get to have any style you like and add as many touches as you like, such as  

  • Storage space 
  • Energy saving features 
  • Heated towel rack  
  • Mirrors  

Many different styles  

  • Contemporary style 
  • Eclectic style 
  • Modern style  
  • Traditional style 
  • Asian style 
  • Beach style 
  • Craftsman style 
  • Farmhouse style  
Visualizer: Nataliya Yahela

Contact us